
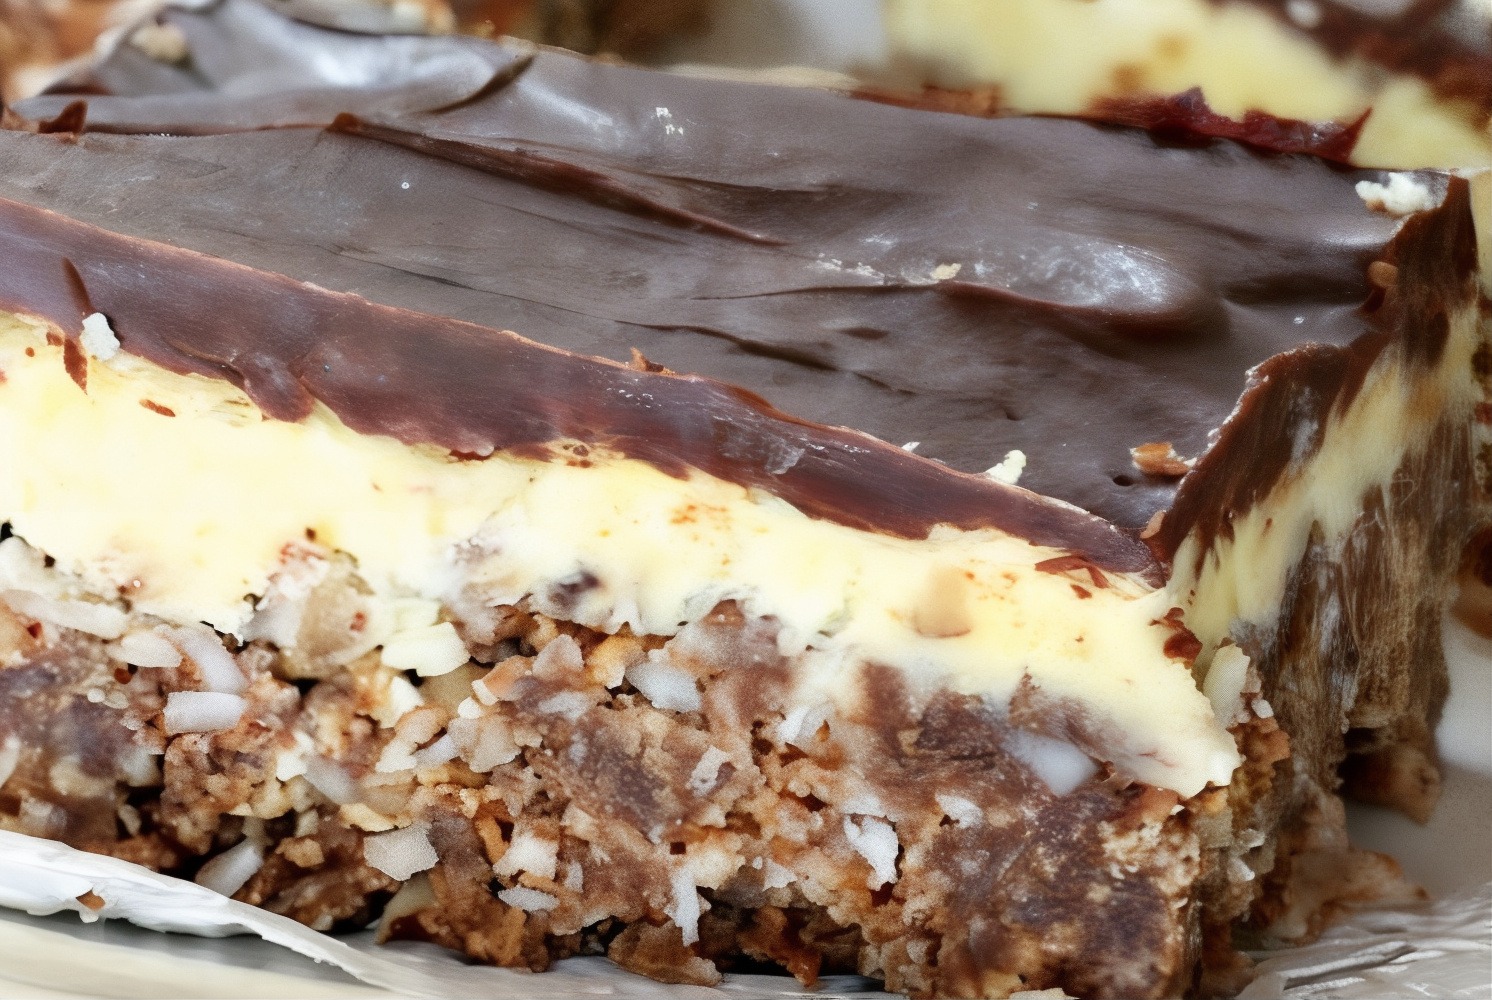

Protein Nanaimo Bars
I had no idea what Nanaimo bars were until someone requested for a healthy version of it, and when I looked it up, I just knew I had to go for it. I found out it was a no-bake dessert named after Nanaimo, a Canadian city in British Columbia. The earliest confirmed printed copy of the recipe using the name "Nanaimo bars" appears in the Edith Adams' prize cookbook (14th edition) in 1953.It consists of three layers: a biscuit crumb base, a custard filling, and a chocolate ganache topping. Quite a high sugar, high fat and calorie dense treat.So...Nanaimo bars…oh how I love you but it was time to have a ‘healthified’ version. And what a joy it is to have created an authentic healthy Nanaimo bar that tastes just like the original, but is made with wholesome ingredients and doesn't require any baking.This new beautiful Protein Nanaimo Bar recipe is made with layers of a coconut-walnut-crust, topped with a silky protein powder custard and finished with a layer of decadent rich chocolatey goodness!A much higher protein, sugar free, low calorie, low fat, gluten free and healthy Nanaimo bar made with all clean ingredients.The idea was to improve the macro balance (protein, carbohydrate, healthy fats). This is not about calorie counting: It's about paying attention to key nutrients and taking in the daily recommended portion your body needs to maintain your energy levels and overall wellbeing. When you find your optimal balance and amounts of macro nutrients, you take a major step toward reaching your health goals and this balance has been improved in this by the addition of healthy protein.This is one of the best dessert/sweet treat recipes I have made in a long time! The recipe can look a bit daunting but it’s not at all, just 3 simple steps. I bought all the ingredients at my local health food store, very easy to find. I love storing these healthier Nanaimo bars in the freezer to have on hand for whenever that sweet tooth craving hits! For a perfect creamy texture, remove from freezer 10-15 minutes before devouring.Taste? Just pure bliss! Go ahead and make these you will be sooooo happy you did!
Servings 12
Ingredients
Chocolate Coconut Base
- 1 cup walnuts or almonds or a mix
- 1 cup dates, soaked 30 minutes and drained
- 1/2 cup oats, instant or quick
- 1/2 cup desiccated coconut
- 1/4 cup cocoa powder
- 1 teaspoon vanilla extract
Protein Custard Filling
- 2 cups cashews, soaked 3+hours and drained
- 1 13.5 oz can coconut cream, full fat (solid part only) *see note below
- 2/3 cup vanilla protein powder
- 1/4 cup coconut oil, melted
- 1/4 cup honey or maple syrup
- 1 teaspoon vanilla extract
Chocolate Topping
- 1 cup chocolate chips
- 1 tablespoon coconut oil
Instructions
Chocolate Coconut Base
- Note: Place the can of coconut cream in the fridge or freezer for at least 1-2 hours before making these bars to allow coconut cream to separate.Line an 8 x 8” baking pan or dish with parchment paper on the bottom and sides leaving some overhanging to act as a handle to get the bars out easier for cutting.Place walnuts and coconut into a food processer and process until broken down and crumbly. Add dates, oats, cocoa powder and vanilla and continue to process until mixture is sticky and well combined. Be careful not to over process as its nice to have texture and different sized “bits” in your base crust.Press the base mixture into the bottom of your pan or dish evenly. Refrigerate while you prepare the filling.
Protein Custard Filling
- Open chilled can and scoop out the cream that has separated and set hard on the top. Save the remaining coconut water to use in a smoothie, drink, or discard.Place all filling ingredients, cashews, coconut cream, coconut oil, honey, protein powder and vanilla extract into the food processor and process until smooth and creamy. Depending on the power of your blender this might take a few minutes. Stop blending to scrape the sides if necessary and continue to blend until very smooth. Pour the filling over the chilled crust and spread evenly with a spatula or the back of a spoon, then place back in the refrigerator.
Chocolate Topping
- Place chocolate chips and coconut oil in small dish and microwave with 30 second bursts at 50% power stirring between each one until melted and smooth.Or use double boiler method - (pot of boiling water with a bowl resting on top) melt the chocolate chips and the coconut oil together.Once melted, pour over filling layer and spread evenly with a spatula or back of a spoon.Lift out entire bar using parchment paper flaps and cut into 12-16 squares (tip: dip knife in boiling water for clean cuts!) Store in the freezer for best texture and let thaw 10-15 minutes before enjoying!
If you are looking for more delicious, healthy, no bake desserts and treats to help you reach your health, wellness and fitness goals, you will love my collection here: Blended Bites