
Next Level Louise Slice
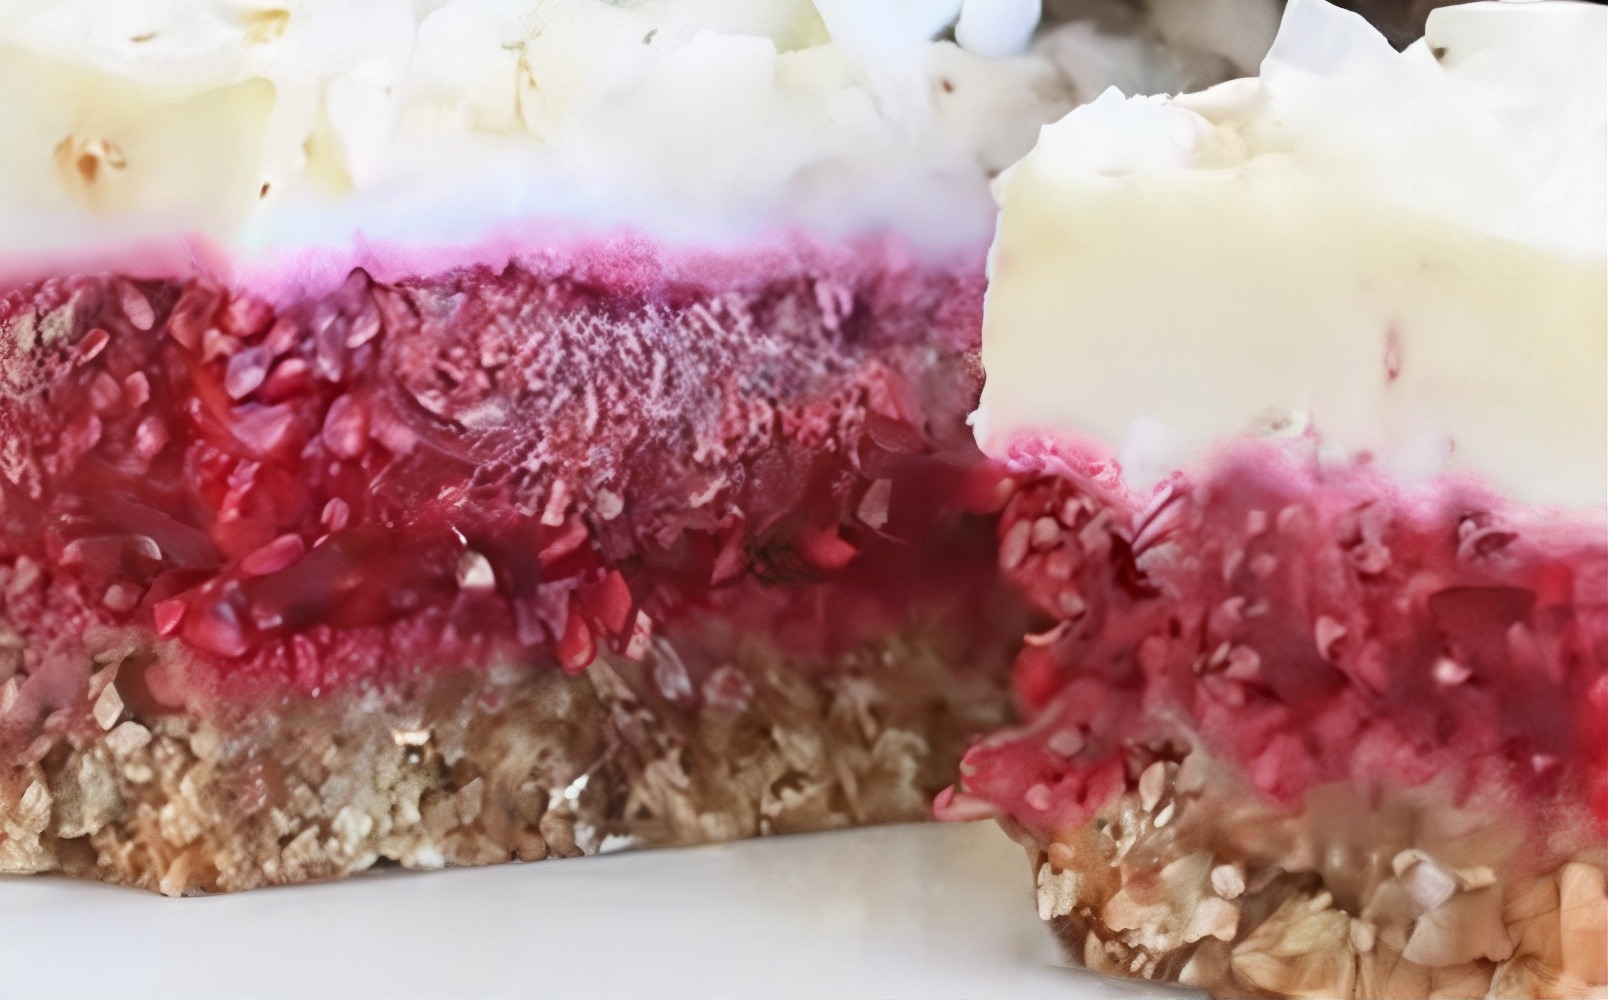
Louise cake or Louise slice is a baked New Zealand sweet dish that consists of raspberry jam and coconut-flavoured meringue on a shortbread base.Its history suggests that the cake was created to celebrate the wedding of Princess Louise of England (one of Queen Victoria’s daughters) in 1871. A recipe for Louise cake was shared in a NZ newspaper in October 1927 after being brought to New Zealand by British settlers.Some people call it ‘old fashioned’ but it was and is a most classic and beloved slices now commonly made as a slice not a cake. If you haven’t heard of, seen, or tried a Louise Slice before, here is your chance to get acquainted in the most delicious way. The old fashioned version is a three-tiered beauty comprising of a buttery biscuit base, a layer of rich raspberry jam, all topped with a coconut-y meringue. The recipe included sugar, butter, eggs, refined white flour and raspberry jam and of course it tasted delicious with all those goodies in it, but now-a-days they are regarded as not so healthy ingredients and we can do better.This ‘healthified’ version is a take on the traditional dessert and just as satisfying! It’s a beautifully delicious homage to this iconic slice recipe. Completely no bake, made with a base crust of almonds and oats sweetened with dates, a middle layer of fruity, berry, chia jam and topped with a delicious, cashew, coconut cream with a hint of lemon. No afternoon would be complete without a slice (or two) and of course its gluten, dairy and sugar free.A classic recipe that has been reinvented as a healthier dessert or snack. Treat yourself to guilt-free indulgence with this delicious recipe. It's designed to conquer those sweet cravings without compromising your dietary or health goals.
Servings 16
Ingredients
Base Crust
- 1 1/2 cups almonds
- 1 cup dates, soaked 30 minutes and drained
- 1 cup desiccated coconut
- 1/2 cup rolled oats
- 1 teaspoon vanilla extract
Raspberry Chia Jam Layer
- 2 cups raspberries, fresh or frozen/defrosted
- 1/4 cup chia seeds
- 2 tablespoons honey or maple syrup
- 1 lemon, juice and zest
Coconut Topping
- 1 cup cashews, soaked 3+ hours and drained
- 1/4 cup water
- 2 tablespoons honey or maple syrup
- 1 teaspoon vanilla extract
- 1/4 cup coconut oil, melted
- 1 1/2 cups desiccated coconut
Topping
- Coconut flakes
Instructions
Base Crust
- Line an 8 x 8” baking pan or dish with parchment paper on the bottom and sides leaving some overhanging to act as a handle to get the bars out easier for cutting.Place almonds into a food processer and process until broken down and crumbly. Add dates, oats, coconut and vanilla and continue to process until mixture is sticky and well combined. Be careful not to over process as its nice to have texture variance and different sized “bits” in your base curst.Press the base mixture into the bottom of your pan or dish evenly.Refrigerate while you prepare the raspberry jam filling.
Raspberry Chia Jam Layer
- Place all raspberry jam layer ingredients into a food processor and process until fully combined. Pour on top of base crust and spread out evenly with a spatula or back of a spoon, then place in the freezer while you make the topping.
Coconut Topping
- Place cashews into a food processor and process until broken down and crumbly. Add water, honey, vanilla and coconut oil and continue to process until mixture is smooth and creamy.Lastly add desiccated coconut and pulse a few times to combine. Scoop out mixture and spread carefully on top of raspberry jam layer.Sprinkle the coconut flakes on top, and place in the freezer for a few hours to set, or in the refrigerator overnight.Remove using the parchment paper handles and cut into 16 squares. Keeps in the refrigerator for up to a week, or in the freezer for 2 months.
If you are looking for more delicious, healthy, no bake desserts and treats to help you reach your health, wellness and fitness goals, you will love my collection here: Blended Bites