

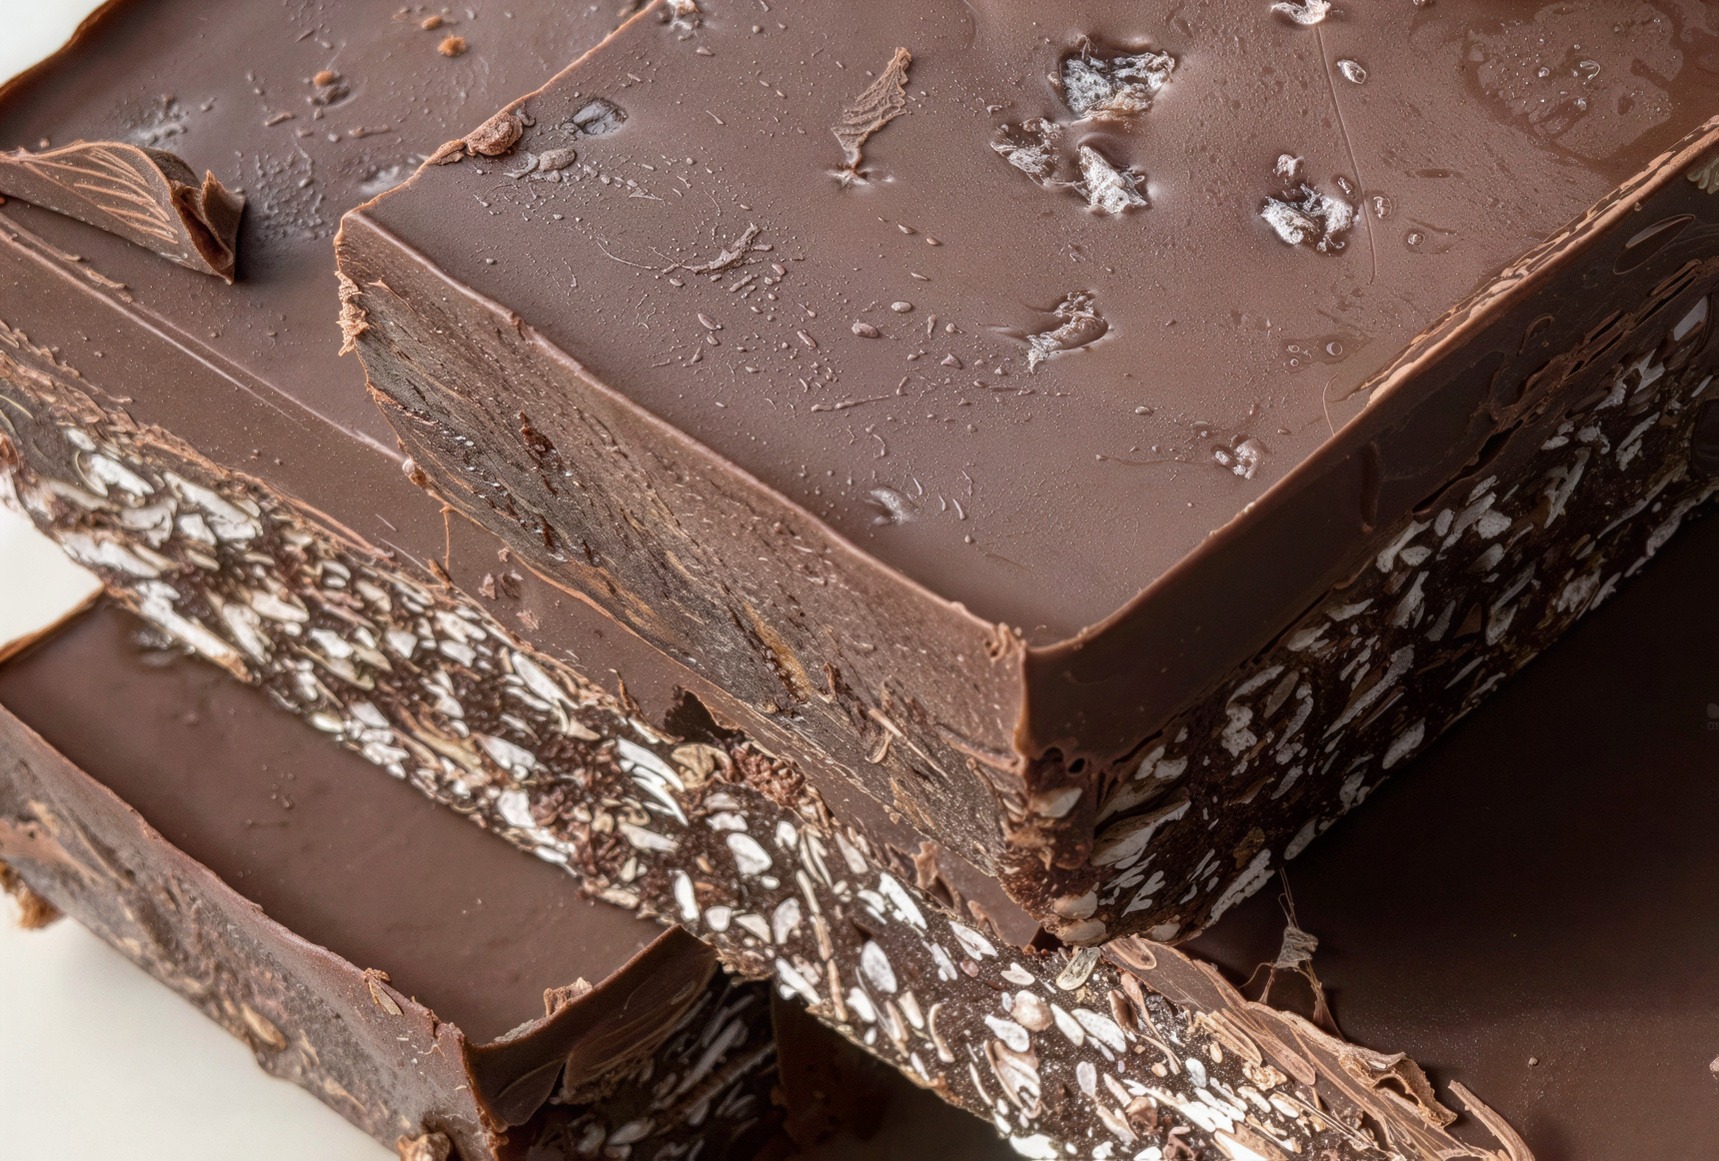
If you love the classic combination of chocolate and coconut, these Coconut Rough Protein Bars are going to be right up your alley!
Think rich chocolate, chewy dates, creamy nut butter, plenty of coconut and a smooth layer of chocolate on top. They are sweet, satisfying and packed with all those delicious flavours that make chocolate-coconut treats so hard to resist.
The best part? These homemade protein bars require no baking and only a handful of simple ingredients.
Dates provide natural sweetness and help bind everything together, nut butter adds richness, desiccated coconut brings that unmistakable coconut rough flavour, and protein powder gives the bars an extra nutritional boost. Finish everything with a layer of melted dark chocolate, pop the bars into the refrigerator and let them set.
It’s that simple!
What Makes These Coconut Rough Bars Special?
Traditional coconut rough is all about the combination of coconut and chocolate. These bars take that familiar flavour and turn it into a more substantial homemade snack.
The dates create a naturally sticky base, while nut butter gives the mixture a creamy texture and helps hold everything together. Coconut adds a lovely chewiness, and chocolate protein powder deepens the chocolate flavour.
You can use almond butter, cashew butter or peanut butter, depending on what you have in the pantry. Each brings a slightly different flavour, so feel free to experiment and find your favourite. I particularly love almond butter for this recipe because it complements the coconut without overpowering it.
And then there is the chocolate topping!
A layer of melted dark chocolate sets into a delicious shell that contrasts beautifully with the softer coconut filling underneath. Every bite delivers that wonderful combination of chewy, creamy and crunchy textures.
Why Make Your Own Protein Bars?
Homemade bars are surprisingly easy to make, and there are some lovely advantages to preparing your own snacks.
You control the ingredients. You know exactly what’s going into your bars, from the type of chocolate you use to the protein powder and nut butter. There is no need for a long list of ingredients when a few simple ones can do the job.
They are easy to customise. Prefer extra coconut? Add a little more. Want a stronger chocolate flavour? Use chocolate protein powder and a darker chocolate topping. You can adjust the recipe to suit your taste.
They are convenient. Make a batch, slice them into individual portions and keep them chilled for whenever you want a quick snack.
And making your own can also be more economical than regularly buying packaged protein bars, particularly if you already keep dates, coconut and protein powder in your pantry.
The Magic Of Dates And Nut Butter
Dates are one of my favourite ingredients for no-bake treats. When blended, soft Medjool dates create a sticky mixture that helps bind ingredients together without needing to bake the bars. They also contribute natural sweetness and a delicious caramel-like flavour.
Nut butter works alongside the dates to create a richer, smoother base. If your dates are a little dry, soak them in warm water for five to ten minutes, then drain and pat them dry before processing. Soft dates blend much more easily and help create a better texture.
Protein powder and coconut absorb moisture, so the mixture should feel slightly sticky when pressed between your fingers. If it seems too dry, add a teaspoon of water or milk at a time until it holds together.
Let Us Talk About The Coconut
Desiccated coconut gives these bars their signature coconut rough character. It adds texture, a gentle coconut flavour and a lovely contrast to the chocolate. You can use fine or medium desiccated coconut, depending on the texture you prefer. For an even more pronounced coconut flavour, try lightly toasting a small portion of the coconut before adding it to the mixture. Allow it to cool completely first.
You could also sprinkle a little extra coconut over the chocolate topping before it sets. It looks beautiful and gives everyone a hint of what is waiting inside.
A Chocolate Topping That Makes Them Irresistible
The finishing touch is a layer of melted dark chocolate. Choose a chocolate you genuinely enjoy eating. A darker chocolate creates a lovely contrast with the sweet dates and creamy nut butter, while a slightly sweeter chocolate gives the bars a more dessert-like finish.
A little coconut oil helps the chocolate melt smoothly and can make the topping easier to slice once set.
For neat bars, let the chocolate firm up in the refrigerator before cutting. Using a sharp knife warmed under hot water and wiped dry between cuts can help prevent the chocolate from cracking.
Addition Eating: Treats That Nourish And Delight
At Blended Bites, I believe healthy eating should be about adding goodness, not constantly taking things away.
These Coconut Rough Protein Bars are a lovely example. You get to enjoy the delicious flavours of chocolate and coconut while incorporating ingredients such as dates, nut butter and protein powder.
There is no need to label foods as forbidden or feel that enjoying a chocolate treat means you have done something wrong. Food can be nourishing and enjoyable at the same time. Make a batch for the week, keep them chilled and enjoy one whenever you are craving something chocolatey and satisfying.
Chocolate, coconut and a protein boost – all wrapped up in one delicious no-bake bar. 🥥🍫
I love that you can make your own protein bars at home to save money and skip processed additives. Here are some more recipes that are no-bake, protein-rich, totally customizable – made with your favorite protein powder and simple pantry ingredients.

These Cookie Dough Protein Bars are soft, chewy no-bake bars made with oat flour, vanilla protein powder, nut…
View Recipe
These Strawberries And Cream Protein Bars are creamy no-bake bars made with shredded coconut, coconut cream, freeze-dried strawberries,…
View Recipe
Soft and chewy no-bake Coconut Birthday Cake Protein Bars made with coconut flour, vanilla protein powder and coated…
View Recipe
Coconut Rough Protein Bars
Ingredients
Coconut Protein Bar Base
- 1 cup soft Medjool dates, pitted
- 1 cup desiccated coconut
- 1/2 cup almond butter, cashew butter or peanut butter
- 2 scoops chocolate protein powder
- 2 tablespoons cocoa powder
- 1/2 teaspoon vanilla extract
- Pinch of sea salt
- 1-3 tablespoons milk or water, as needed
Chocolate Topping
- 1 cup dark chocolate chips or chopped chocolate
- 1 tablespoon coconut oil
Optional Toppings
- 2 tablespoons desiccated coconut
- Pinch of flaky sea salt
- Finely chopped toasted nuts
Instructions
- Prepare the dates: If your dates are firm, soak them in warm water for 5–10 minutes. Drain thoroughly and pat dry.Blend the base: Place the dates and nut butter in a food processor. Process until the mixture becomes sticky and mostly smooth.Add the dry ingredients: Add the desiccated coconut, protein powder, cocoa powder, vanilla and salt. Process until the mixture comes together.Adjust the texture: If the mixture is too dry or crumbly, add milk or water a teaspoon at a time. It should hold together when pressed between your fingers.Press into the pan: Line a small square baking pan or loaf tin with baking paper. Press the mixture firmly and evenly into the base.Melt the chocolate: Gently melt the dark chocolate with the coconut oil in the microwave in short intervals, stirring between each, or use a heatproof bowl over a saucepan of gently simmering water.Add the topping: Pour the melted chocolate over the coconut base and spread evenly. Sprinkle with extra coconut or chopped nuts if desired.Chill: Refrigeratefor 1–2 hours, or until the chocolate has set and the base is firm.Slice and serve: Lift the slab from the pan and cut into 8-10 bars using a sharp knife.Store the bars in an airtight container in the refrigerator for up to one week.They can also be frozen for up to two months. Separate layers with baking paper and thaw in the refrigerator before serving.
If you are looking for more delicious, healthy, protein-rich, no bake desserts and treats to help you reach your health, wellness and fitness goals, you will love my collection here: Blended Bites

