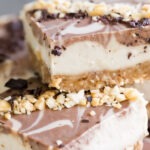
Swirled Chocolate Coconut Protein Bars
These bad boys have a nut, date and coconut crust and a super creamy cashew-based coconut cream lemon-y filling – you would never guess that they are healthy and refined sugar-free!
Servings 16
Ingredients
Base Crust
- 1 1/2 cups almonds, pecans or walnuts or a mix
- 1 cup dates, soaked 30 minutes and drained
- 1/2 cup desiccated coconut
Cashew Coconut Filling
- 2 cups cashews, soaked 3+hours and drained
- 1 13.5 oz can coconut cream, full fat (solid part only) *see note below
- 1/4 cup protein or collagen peptides powder
- 1/4 cup honey or maple syrup
- 2 tablespoons coconut oil, melted
- 1-2 lemons, juice and zest (depending on how lemon-y you like it)
- Chopped nuts and shaved chocolate, to garnish
Instructions
Base Crust
- Note: Place the can of coconut cream or milk in the fridge or freezer for at least 1-2 hours before making these bars to allow coconut cream to separate.Line a 8 x 8-inch baking pan or dish with parchment paper on the bottom and sides leaving some overhanging to act as a handle to get the bars out easier for cutting.Place almonds into a food processer and process until broken down and crumbly. Add dates and coconut and continue to process until mixture is sticky and well combined.Be careful not to over process as its nice to have texture variance and different sized “bits” in your base crust.Press the base mixture into the bottom of your pan or dish evenly. Refrigerate while you prepare the filling.
Cashew Coconut Filling
- Open chilled can and scoop out the cream that has separated and set hard on the top. Save the remaining coconut water to use in a smoothie, drink, or discard.Place all filling ingredients, cashews, coconut cream, coconut oil, protein powder, honey, lemon juice and zest into the food processor and process until smooth and creamy.Depending on the power of your blender this might take a few minutes. Stop blending to scrape the sides and continue to blend until very smooth. Taste test and add more honey or lemon if you think it needs it.Once it’s smooth, and you have adjusted the sweetness/tartness levels, pour 2/3 of the filling into the chilled crust and spread evenly with a spatula or the back of a spoon.Add the cocoa powder to the remaining filling and blend briefly until combined. Dollop over the remainder of the filling now flavoured with cocoa and swirl in with a knife – careful not to over swirl, you don’t want it to get muddy.Place in the freezer to set for at least 3 hours or until completely firm.Once the bars are firm, cut into 16 squares. I recommend running your knife under hot water to warm it up before cutting the bars with the still-hot (dried) knife. Garnish with chopped nuts and chocolate.Serve frozen or let them thaw at room temperature for 10-15 minutes before serving. Store in the freezer for up to a month.