Ferrero Rocher Protein Balls
My take on a healthier Ferrero Rocher made with better-for-you ingredients and tastes just like the best chocolate hazelnut truffles in protein ball form. Great as a snack or a lighter dessert.
Servings 12
Ingredients
Hazelnut Filling
- 3/4 cup whole hazelnuts (reserve 14 nuts)
- 1/4 cup hazelnut butter - store bought or homemade recipe below in notes or use nut/seed butter of choice
- 1 cup dates, soaked 30 minutes and drained
- 1/4 cup protein or collagen powder
- 2 tablespoons cocoa powder
- 1 tablespoon coconut oil, melted
- 1 1/2 teaspoons vanilla extract
Chocolate Coating
- 1/2 cup chocolate chips
- 2 teaspoons coconut oil
- 3 tablespoons hazelnuts chopped
Instructions
Hazelnut Filling
- Set aside 14 whole hazelnuts for the center of each ball. You might not need all of them, it depends on the size of the balls (the recipe makes 12-14 balls). Process the remaining whole hazelnuts in a food processor for a couple of seconds until they are coarse but not fine like flour.Add all other ingredients of the filling mixture - hazelnut butter, dates, protein powder, cocoa powder, coconut oil and vanilla extract and blend again for a couple of seconds. Be careful not to over process as its nice to have texture variance and different sized “bits” in your protein balls.If necessary, stop the food processor and scrape down the sides of the machine with a spatula blend or pulse again for a few seconds. The mixture should hold together and be slightly sticky.Use about 1 tablespoon of the mixture per ball and shape it with your hands to form a ball. Place a whole hazelnut into the center of each ball and seal it with the mixture around it.Repeat with the remaining dough. Place all balls on a plate lined with parchment paper and place in the freezer for 30 minutes to firm up and set.
Chocolate Coating
- Place chocolate chips and coconut oil in small dish and microwave with 30 second bursts stirring between each one until melted and smooth.Or use double boiler method - (pot of boiling water with a bowl resting on top) melt the chocolate chips and the coconut oil together.Once melted add the chopped hazelnuts and stir until combined.Remove the balls and after checking they are firm and set, skewer each ball or use two forks to hold and one by one, dip into the melted chocolate, then place back on the parchment lined tray.Or hold each one with a fork over the melted chocolate and spoon it over letting the excess drip back into the bowl. Put the plate in the fridge until the balls firm up (about 30 minutes). You can also put them in the freezer for about 15 minutes. Store leftovers in the fridge for up to 2 weeks or in the freezer for up to 3 monthsIf frozen, simply remove one from the freezer and allow it to soften up for about 10-15 minutes.Useful Recipe Tips & VariationsRather than adding the chopped hazelnuts to the melted chocolate, you could put them in a bowl/plate. Dip the hazelnut truffle balls in the melted chocolate, then immediately roll over the ground nuts.Hazelnut butter will taste best in this recipe. However, if you are finding it hard to source, then make your own (recipe below in notes) or swap it out with another nut or seed butter like almond butter, peanut butter, sunflower seed butter or even tahini (sesame seed paste).Use raw or roasted hazelnuts. Roasted hazelnuts will intensify the nutty flavor and add extra flavor. See recipe below in notes.
Notes
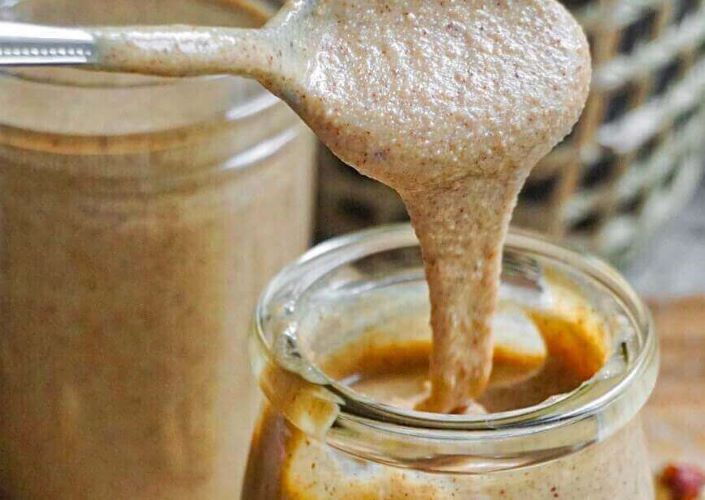
How to Make Homemade Hazelnut Butter - made with one ingredient and ready in 15 minutes! Creamy, easy and delicious!
3 cups hazelnuts, raw
Preheat oven to 350℉ and place hazelnuts on a baking sheet. Roast for 10 minutes.
Transfer the roasted hazelnuts along with a pinch of salt (if using) to a food processor and process for 5-7 minutes, stopping to scrape down the sides as needed, until it becomes smooth and creamy.
It may take longer depending on how powerful your food processor is. Be patient - it will get there!
If using, add your desired flavor mix-ins (such as honey, maple syrup or vanilla) and process for another 3-5 minutes, until it becomes creamy and silky. It will form back into a ball when you add it, but it will become smooth and creamy again.
Once desired texture is achieved, pour into jars. If it were me, I would eat it with a spoon straightaway. :)
Store homemade hazelnut butter in a jar in the fridge for up to a month.